Menu Close

MARAC Spring 2012: Preservation of Digital Materials (Session S1)

602px-Zip-100a-transparent.png

The official title for this session is “Preservation and Conservation of Captured and Born Digital Materials” and it was divided into three presentations with introduction and question moderation by Jordon Steele, University Archivist at Johns Hopkins University.

Digital Curation, Understanding the lifecycle of born digital items

Isaiah Beard, Digital Data Curator from Rutgers, started out with the question ‘What Is Digital Curation?’. He showed a great Dilbert cartoon on digital media curation and the set of six photos showing all different perspectives on what digital curation really is (a la the ‘what I really do’ meme – here is one for librarians).

“The curation, preservation, maintenance, collection and archiving of digital assets.” — Digital Curation Center.

What does a Digital Curator do?

Aquire digital assets:

  • digitized analog sources
  • assets that were born digital, no physical analog exists

Certify content integrity:

  • workflow and standards and best practices
  • train staff on handling of the assets
  • perform quality assurance

Certify trustworthiness of the architecture:

  • vet codecs and container/file formats – must make sure that we are comfortable with the technology, hardware and formats
  • active role in the storage decisions
  • technical metadata, audit trails and chain of custody

Digital assets are much easier to destroy than physical objects. In contrast with physical objects which can be stored, left behind, forgotten and ‘rediscovered’, digital objects are more fragile and easier to destroy. Just one keystroke or application error can destroy digital materials. Casual collectors typically delete what they don’t want with no sense of a need to retain the content. People need to be made aware that the content might be important long term.

Digital assets are dependent on file formats and hardware/software platforms. More and more people are capturing content on mobile devices and uploading it to the web. We need to be aware of the underlying structure. File formats are proliferating and growing over time. Sound files come in 27 common file formats and 90 common codecs. Moving images files come in 58 common containers/codecs and come with audio tracks in the 27 file formats/90 common codecs.

Digital assets are vulnerable to format obsolescence — examples include Wordperect (1979), Lotus 1-2-3 (1978) and Dbase (1978). We need to find ways to migrate from the old format to something researchers can use.

Physical format obsolescence is a danger — examples include tapes, floppy disk, zip disk, IBM demi-disk and video floppy. There is a threat of a ‘digital dark age’. The cloud is replacing some of this pain – but replacing it with a different challenge. People don’t have a sense of where their content is in the physical world.

Research data is the bleeding edge. Datasets come in lots of different flavors. Lots of new and special file formats relating specifically to scientific data gathering and reporting… long list including things like GRIB (for meterological data), SUR (MRI data), DWG (for CAD data), SPSS (for statistical data from the social sciences) and on and on. You need to become a specialist in each new project on how to manage the research data to keep it viable.

There are ways to mitigate the challenges through predictable use cases and rigid standards. Most standard file types are known quantities. There is a built-in familiarity.

File format support: Isaiah showed a grid with one axis Open vs Closed and the other Free vs Proprietary. Expensive proprietary software that does the job so well that it is the best practice and assumed format for use can be a challenge – but it is hard to shift people from using these types of solutions.

Digital Curation Lifecycle

  • Objects are evaluated, preserve, maintained, verified and re-evaluated
  • iterative – the cycle doesn’t end with doing it just once
  • Good exercise for both known and unknown formats

The diagram from the slide shows layers – looks like a diagram of the geologic layers of the earth.

Steps:

  • data is the center of the universe
  • plan, describe, evaluate, learn meanings.
  • ingest, preserve curate
  • continually iterate

Controlled chaos! Evaluate the collection and needs of the digital assets. Using preservation grade tools to originate assets. Take stock of the software, systems and recording apparatus . Describe in the tech metadata so we know how it originated. We need to pick our battles and need to use de facto industry standards. Sometimes those standards drive us to choices we wouldn’t pick on our own. Example – final cut pro – even though it is mac and proprietary.

Establish a format guide and handling procedures. Evaluate the veracity and longevity of the data format. Document and share our findings. Help others keep from needing to reinvent the wheel.

Determine method of access: How are users expected to access and view these digital items? Software/hardware required? View online – plug-in required? third party software?

Primary guidelines: Do no harm to the digital assets.

  • preservation masters, derivatives as needed
  • content modification must be done with extreme care
  • any changes must be traceable, audit-able, reversible.

Prepare for the inevitable: more format migrations. Re-assess the formats.. migrate to new formats when the old is obsolete. Maintain accessibility while ensuring data integrity.

At Rutgers they have the RUcore Community Repository which is open source, and based on FEDORA. It is dedicated to the digital preservation of multiple digital asset types and contains 26,238 digital assets (as of April 2012). Includes audio, video, still images, documents and research data. Mix of digital surrogates and born digital assets.

Publicly available digital object standards are available for all traditional asset types. Define baseline quality requirements for ‘reservation grade’ files. Periodically reviewed and revised as tech evolves. See Rutgers’ Page2Pixel Digital Curation standards.

They use a team approach as they need to triage new asset types. Do analysis and assessment. Apply holistic data models and the preservation lifecycle and continue to publish and share what they have done. Openness is paramount and key to the entire effort.

More resources:

The Archivist’s Dilemma: Access to collections in the digital era

Next, Tim Pyatt from Penn State spoke about ‘The Archivist’s Dilemma’ — starting with examples of how things are being done at Penn State, but then moving on to show examples of other work being done.

There are lots of different ways of putting content online. Penn State’s digital collections are published online via ContentDM, Flickr, social media and Penn State IR Tools. The University Faculty Senate put up things on their own. Internet Archive. Custom built platform. Need to think about how the researcher is going to approach this content.

With analog collections that have portions digitized they describe both, but then includes a link to digital collection. These link through to a description of the digital collection.. and then links to CONTENTdm for the collection itself.

Examples from Penn State:

  • A Google search for College of Agricultural Science Publications leads users to a complimentary/competing site with no link back to the catalog nor any descriptive/contextual information.
  • Next, we were shown the finding aid for William W. Scranton Papers from Penn State. They also have images up on Flickr ‘William W. Scranton Papers’ . Flickr provides easy access, but acts as another content silo. It is crucial to have metadata in the header of the file to help people find their way back to the originating source. Google Analytics showed them that 8x more often content is seen in Flickr than CONTENTdm.
  • The Judy Chicago Art Education Collection is a hybrid collection. The finding aid has a link to the curriculum site. There is a separate site for the Judy Chicago Art Education Collectiion more focused on providing access to her education materials.
  • The University Curriculum Archive is a hybrid collection with a combination of digitized old course proposals, while the past 5 years of curriculum have been born digital. They worked with IT to build a database to commingle the digitized & born digital files. It was custom built and not integrated into other systems – but at least everything is in one place.

Examples of what is being done at other institutions:

PennState is loading up a Hydra repository for their next wave!

Born-Digital @UVa: Born Digital Material in Special Collections

Gretchen Gueguen, UVA

Presentation slides available for download.

AIMS (An Inter-Institutional Model for Stewardship) born digital collections: a 2 year project to create a framework for the stewardship of born-digital archival records in collecting repositories. Funded by Andrew W. Mellon Foundation with partners: UVA, Stanford, University of Hull, and Yale. A white paper on AIMS was published in January 2012.

Parts of the framework: collection development, accessioning, arrangement & description, discovery & access are all covered in the whitepaper – including outcomes, decision points and tasks. The framework can be used to develop an institutionally specific workflow. Gretchen showed an example objective ‘transfer records and gain administrative control’ and walked through outcome, decision points and tasks.

Back at UVA, their post-AIMS strategizing is focusing on collection development and accessioning.

In the future, they need to work on Agreements: copyright, access & ownership policies and procedures. People don’t have the copyright for a lot of the content that they are trying to donate. This makes it harder, especially when you are trying to put content online. You need to define exactly what is being donated. With born digital content, content can be donated multiple places. Which one is the institution of record? Are multiple teams working on the same content in a redundant effort?

Need to create a feasibility evaluation to determine systematically if something is it worth collecting. Should include:

  • file formats
  • hardware/software needs
  • scope
  • normalization/migration needed?
  • private/sensitive information
  • third-party/copyrighted information?
  • physical needs for transfer (network, storage space, etc.)

If you decide it is feasible to collect, how do you accomplish the transfer with uncorrupted data, support files (like fonts, software, databases) and ‘enhanced curation’? You may need a ‘write blocker’ to make sure you don’t change the content just by accessing the disk. You may want to document how the user interacted with their computer and software. Digital material is very interactive – you need to have an understanding of how the user interacted with it. Might include screen shots.

Next she showed their accessioning workflow:

  • take the files
  • create a disk image – bit for bit copy – makes the preservation master
  • move that from the donor’s computer to their secure network with all the good digital curation stuff
  • extract technical metadata
  • remove duplicates
  • may not take stuff with PPI
  • triage if more processing is necessary

Be ready for surprises – lots of things that don’t fit the process:

  • 8″ floppy disk
  • badly damaged CD
  • disk no longer functions – afraid to throw away in case of miracle
  • hard drive from 1999
  • mini disks

These have no special notation taken of them in the accessioning.

Priorities with this challenging material:

  • get the data of aging media
  • put it someplace safe and findable
  • inventory
  • triage
  • transfer

Forensic Workstation:

  • FRED = forensic recovery of evidence device – built in ultra bay writeblocker with usb, firewire, sata, csi, ide ad molex for power- external 5.25 floppy drive, cd/dvd/blu-ray, microcard reader, LTO tape drive, external 3.5″ drive + external hard drive for additional storage.
  • toolbox
  • big screen

FRED’s FDK software shows you overview of what is there, recognizes 1,000s of file format, deleted data, finds duplicates, and can identify PPI. It is very useful for description and for selecting what to accession – but it costs a lot and requires an annual license.

BitCurrator is making an open source version. From their website: “The BitCurator Project is an effort to build, test, and analyze systems and software for incorporating digital forensics methods into the workflows of a variety of collecting institutions.”

Archivematica:

  • creates PREMIS record recording what activities are done – preservation metadata standard
  • creates derivative records – migration!!
  • yields a preservation master + access copies to be provided in the reading room

Hoping for Hypatia like thing in the future

Final words: Embrace your inner nerd! Experiment – you have nothing to loose. If you do nothing you will lose the records anyway.

Questions and Answers

QUESTION: How do you convince your administration that this needs to be a priority?

ANSWER:

Isaiah: Find examples of other institutions that are doing this. Show them that our history is at risk moving forward. A digital dark age is coming if we don’t do something now. It is really important that we show people “this is what we need to preserve”

Tim: Figure out who your local partners are. Who else has a vested interest in this content? IT was happy at Penn State that they didn’t need to keep everything – happy that there is an appraisal process.. and that they are preserving content so it doesn’t need to be kept by everyone. I am one of the authors of the upcoming report on born digital records — end of the summer: Association of Research Libraries – Managing Electronic Records – Spec Kit

Gretchen: Numbers are really useful. Sometimes you don’t think about it, but it is a good practice to count the size of what you created. How much time would it take to recreate it if you lost it. How many people have used the content? Get some usage stats. Who is your rival and what are their statistics?

Jordon: Point to others who you want to keep up with

QUESTION: would the panelists like to share experiences with preserving dynamic digital objects like databases?

ANSWER:

Isaiah: We don’t want to embarrass people. We get so many different formats. It is a trial and error thing. You need to say gently that there is a better way to do this. Sad example – burned DVDs from tapes in 2004.. got them in 2007. The DVDs were not verified. They were not stored well – stored in a hot warehouse. Opened the boxes and found unreadable DVDs – delaminating.

Tim: From my Duke Days, we had a number of faculty data sets in proprietary formats. We would do checksums on them, wrap them up and put them in the repository. They are there.. but who knows if anyone will be able to read them later. Same as with paper – preserve them now in good acid-free papers.

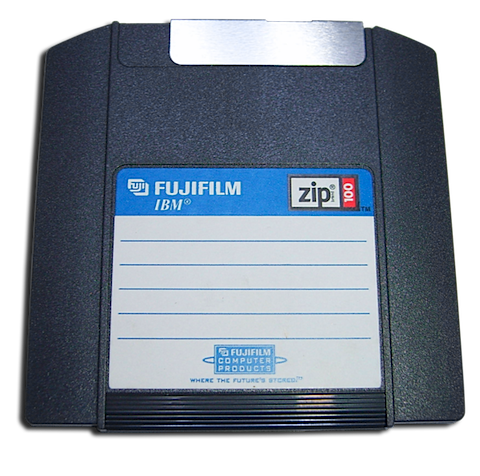
Gretchen: My 19 yo student held up a zip disk and said “Due to my extreme youth I don’t know what this is!” (And now you know why there is a photo of a zip disk at the top of this post – your reward for reading all the way to the end!)

Image Credit: ‘100MB Zip Disc for Iomega Zip, Fujifilm/IBM-branded‘ taken by Shizhao

As is the case with all my session summaries from MARAC, please accept my apologies in advance for any cases in which I misquote, overly simplify or miss points altogether in the post above. These sessions move fast and my main goal is to capture the core of the ideas presented and exchanged. Feel free to contact me about corrections to my summary either via comments on this post or via my contact form.
Digitization Quality vs Quantity: An Exercise in Fortune Telling

The quality vs quantity dilemma is high in the minds of those planning major digitization projects. Do you spend your time and energy creating the highest quality images of your archival records? Or do you focus on digitizing the largest quantity you can manage? Choosing one over the other has felt a bit like an exercise in fortune telling to me over the past few months, so I thought I would work through at least a few of the moving parts of this issue here.

The two ends of the spectrum are traditionally described as follows:

  • digitize at very high quality to ensure that you need not re-digitize later, create a high quality master copy from which all possible derivatives can be created later
  • digitize at the minimum quality required for your current needs, the theory being that this will increase the quantity of digitized records you can digitize

This sounds very well and good on the surface, but this is not nearly as black and white a question as it appears. It is not the case that one can simply choose one over the other. I suppose that choosing ‘perfect quality’ (whatever that means) probably drives the most obvious of the digitization choices. Highest resolution. 100% accurate transcription. 100% quality control.

It is the rare digitization project that has the luxury of time and money required to aim for such a definition of perfect. At what point would you stop noticing any improvement, while just increasing your the time it takes to capture the image and the disk space required to store it? 600 DPI? 1200 DPI? Scanners and cameras keep increasing the dots per inch and the megapixels they can capture. Disk space keeps getting cheaper. Even at the top of the ‘perfect image’ spectrum you have to reach a point of saying ‘good enough’.

When you consider the choices one might make short of perfect, you start to get into a gray area in which the following questions start to crop up:

  • How will lower quality image impact OCR accuracy?
  • Is one measure of lower quality simply a lower level of quality assurance (QA) to reduce the cost and increase the throughput?
  • How will expectations of available image resolution evolve over the next five years? What may seem ‘good enough’ now, may seem grainy and sad in a few years.
  • What do we add to the images to improve access? Transcription? TEI? Tagging? Translation?
  • How bad is it if you need to re-digitize something that is needed at a higher resolution on demand? How often will that actually be needed?
  • Will storing in JPEG2000 (rather than TIFF)  save enough money from reduced disk space to make it worth the risk of a lossy format? Or is ‘visually lossless‘ good enough?

Even the question of OCR accuracy is not so simple. In D-Lib Magazine‘s article from the July/August 2009 issue titled Measuring Mass Text Digitization Quality and Usefulness the authors list multiple types of accuracy which may be measured:

  • Character accuracy
  • Word accuracy
  • Significant word accuracy
  • Significant words with capital letter start accuracy (i.e. proper nouns)
  • Number group accuracy

So many things to consider!

The primary goal of the digitization project I am focused on is to increase access to materials for those unable to travel to our repository. As I work with my colleagues to navigate the choices, I find myself floating towards the side of ‘good enough’ across the board. Even the process of deciding this blog post is done has taken longer than I meant it to. I publish it tonight with the hope to put a line in the sand and move forward with the conversation. For me, it all comes back to what are you trying to accomplish.

I would love to hear about how others are weighing all these choices. How often have long term digitization programs shifted their digitization standards? What aspects of your goals are most dramatically impacting your priorities on the quality vs quantity scale?

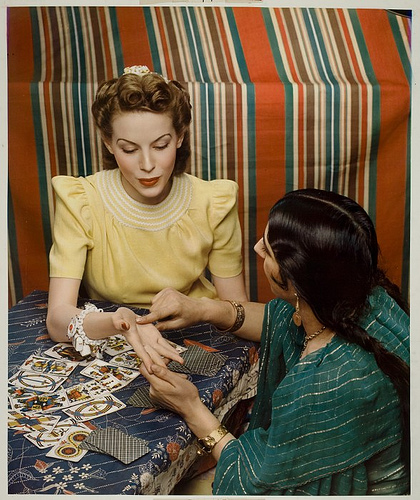
Image Credit: Our lovely fortune teller is an image from the George Eastman House collection in the Flickr Commons, taken by Nickolas Muray in 1940 for use by McCall’s Magazine. [UPDATED 1/6/2019: Image no longer on Flickr, but is available in the Eastman Museum online collection.]

Digitization Program Site Visit: Archives of American Art

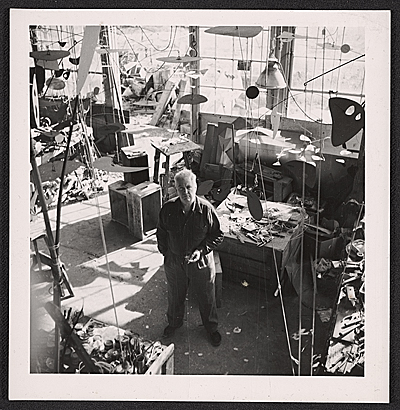
The image of Alexander Calder above shows him in his studio, circa 1950. It is from a folder titled Photographs: Calder at Work, 1927-1956, undated, part of Alexander Calder’s Papers held by the Smithsonian Archives of American Art and available online through the efforts of their digitization project. I love that this image capture him in his creative space – you get to see the happy chaos from which Calder drew his often sleek and sparse sculptures.

Back in October, I had the opportunity to visit with staff of the digitization program for the Smithsonian Archives of American Art along with a group of my colleagues from the World Bank. This is a report on that site visit. It is my hope that these details can help others planning digitization projects – much as it is informing our own internal planning.

Date of Visit: October 18, 2011

Destination: Smithsonian Archives of American Art

Smithsonian Archives of American Art Hosts:

Summary:  This visit was two hours in length and consisted of a combination of presentation, discussion and site tour to meet staff and examine equipment.

Background: The Smithsonian’s Archives of American Art (AAA) program was first funded by a grant from the Terra Foundation of American Art in 2005, recently extended through 2016. This funding supports both staff and research.

Their digitization project replaced their existing microfilm program and focuses on digitizing complete collections. Digitization focused on in-house collections (in contrast with collections captured on microfilm from other institutions across the USA as part of their microfilm program).

Over the course of the past 6 years, they have scanned over 110 collections – a total of 1,000 linear feet – out of an available total of 13,000 linear feet from 4,500 collections. They keep a prioritized list of what they want digitized.

The Smithsonian DAM (digital asset management system) had to be adjusted to handle the hierarchy of EAD and the digitized assets. Master files are stored in the Smithsonian DAM. Files stored in intermediate storage areas are only for processing and evaluation and are disposed of after they have been ingested into the DAM.

Current staffing is two and a half archivists and two digital imaging specialists. One digital imaging specialist focuses on scanning full collections, while the other focuses on on-demand single items.

The website is built in ColdFusion and pulls content from a SQL database. Currently they have no way to post media files (audio, oral histories, video) on the external web interface.

They do not delineate separate items within folders. When feedback comes in from end users about individual items, this information is usually incorporated into the scope note for the collection, or the folder title of the folder containing the item. Full size images in both the image gallery and the full collections are watermarked.

They track the processing stats and status of their projects.

Standard Procedures:

Full Collection Digitization:

  • Their current digitization workflow is based on their microfilm process. The workflow is managed via an internal web-based management system. Every task required for the process is listed, then crossed off and annotated with the staff and date the action was performed.
  • Collections earmarked for digitization are thoroughly described by a processing archivist.
  • Finding aids are encoded in EAD and created in XML using NoteTab Pro software.
  • MARC records are created when the finding aid is complete. The summary information from the MARC record is used to create the summary of the collection published on the website.
  • Box numbers and folder numbers are assigned and associated with a finding aid. The number of the box and folder are all a scanning technician needs.
  • A ‘scanning information worksheet’ provides room for notes from the archivist to the scanning technician.  It provides the opportunity to indicate which documents should not be scanned. Possible reasons for this are duplicate documents or those containing personal identifying information (PIP).
  • A directory structure is generated by a script based on the finding aid, creating a directory folder for each physical folder which exists for the collection. Images are saved directly into this directory structure. The disk space to hold these images is centrally managed by the Smithsonian and automatically backed up.
  • All scanning is done in 600dpi color, according to their internal  guidelines. They frequently have internal projects which demand high resolution images for use in publication.
  • After scanning is complete, the processing archivist does the post scanning review before the images are pushed into the DAM for web publication.
  • Their policy is to post everything from a digitized collection, but they do support a take-down policy.
  • A recent improvement was made in January, 2010. At that time they relaunched the site to include all of their collections co-located on the same list, both digitized and non-digitized.

On Demand Digitization:

  • Patrons may request the digitization of individual items.
  • These requests are evaluated by archivists to determine if it is appropriate to digitize the entire folder (or even box) to which the item belongs.
  • Requests are logged in a paper log.
  • Item level scanning ties back to an item level record with an item ID. There is an ‘Online Removal Notice’ to create item level stub.
  • An item level cataloger describes the content after it is scanned.
  • Unless there is an explicit copyright or donor restriction, the items is put online in the Image Gallery (which currently has 12,000 documents).
  • Access to images is provided by keyword searching.
  • Individual images are linked back to the archival description for the collection from which they came.

Improvements/Changes they wish for:

  • They currently have no flexibility to make changes in the database nimbly. It is a tedious process to change the display and each change requires a programmer.
  • They would like to consider a move to open source software or to use a central repository – though they have concerns about what other sacrifices this would require.
  • Show related collections, list connected names (currently the only options for discovery are an A-Z list of creators or keyword search).
  • Ability to connect to guides and other exhibits.

References:

Image Credit: Alexander Calder papers, Archives of American Art, Smithsonian Institution.

Digitization Program Site Visit: University of Maryland

I recently had the opportunity to visit with staff of the University of Maryland, College Park’s Digital Collections digitization program along with a group of my colleagues from the World Bank. This is a report on that site visit. It is my hope that these details can help others planning digitization projects – much as it is informing our own internal planning.

Date of Visit: October 13, 2011

Destination: University of Maryland, Digital Collections

University of Maryland Hosts:

Summary:  This visit was two hours in length and consisted of a one hour presentation and Q&A session with Jennie Levine Knies, Manager of Digital Collections followed by a one hour tour and Q&A session with Alexandra Carter, Digital Imaging Librarian.

Background: The Digital Collections of the University of Maryland was launched in 2006 using Fedora Commons. It is distinct from the ‘Digital Repository at the University of Maryland’, aka DRUM, which is built on DSpace. DRUM contains faculty-deposited documents, a library-managed collection of UMD theses and dissertations, and collections of technical reports. The Digital Collections project focuses on digitization of photographs, postcards, manuscripts & correspondence – mostly based on patron demand. In addition, materials are selected for digitization based on the need for thematic collections to support events, such as their recent civil war exhibition.

After a period of full funding, there has been a fall off in funding which has prevented any additional changes to the Fedora system.

Another project at UMD involves digitization of Japanese childrens’ books (George W. Prange Collection) and currently uses “in house outsourcing”. In this scenario, contractors bring all their equipment and staff on site to perform the digitization process.

Standard Procedures:

  • Requests must be made using a combination of the ‘Digital Request Cover Sheet’ and ‘Digital Surrogate Request Sheet. These sheets are then reviewed for completeness by the curator under whose jurisdiction the collection falls. Space on the request forms is provided so that the curator may add additional notes to aid in the digitization process. They decide if it is worth digitizing an entire folder when only specific item(s) are requested. Standard policy is to aim for two week turnaround for digitization based on patron request.
  • The digital request is given a code name for easy reference. They choose these names alphabetically.
  • Staff are assigned to digitize materials. This work is often done by student workers using one of three Epson 10000 XL flatbed scanners. There is also a Zeutschel OS 12000 overhead scanner available for materials which cannot be handled by the flatbed scanners.
  • Alexandra reviews all scans for quality.
  • Metadata is reviewed by another individual.
  • When both the metadata & image quality has been reviewed, materials are published online.

Improvements/Changes they wish for:

  • Easier way to create a web ‘home’ for collections, currently many do not have a main page and creating one requires the involvement of the IT department.
  • Option for users to save images being viewed
  • Option to upload content to their website in PDF format
  • Way to associate transcriptions with individual pages
  • More granularity for workflow: currently the only status they have to indicate that a folder or item is ready for review is ‘Pending’. Since there are multiple quality control activities that must be performed by different staff, currently they must make manual lists to track what phases of QA are complete for which digitized content.
  • Reduce data entry.
  • Support for description at both the folder and item level at the same time. Currently description is only permitted either at the folder level OR at the item level.
  • Enable search and sorting by date added to system. This data is captured, but not exposed.

Lessons Learned:

  • Should have adopted an existing metadata standard rather than creating their own.
  • People do not use the ‘browse terms’ – do not spend a lot of time working on this

Resources:

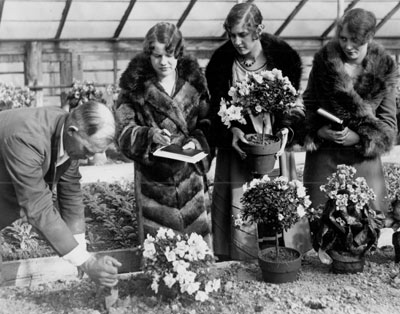
Image Credit: Women students in a green house during a Horticulture class at the University of Maryland, 1925. University Archives, Special Collections, University of Maryland Libraries

Day of Digital Archives

To be honest, today was a half day of digital archives, due to personal plans taking me away from computers this afternoon. In light of that, my post is more accurately my ‘week of digital archives’.

The highlight of my digital archives week was the discovery of the Digital Curation Exchange. I promptly joined and began to explore their ‘space for all things ‘digital curation’ ‘. This led me to a fabulous list of resources, including a set of syllabi for courses related to digital curation. Each link brought me to an extensive reading list, some with full slide decks related to weekly in classroom presentations. My ‘to read’ list has gotten much longer – but in a good way!

On other days recently I have found myself involved in all of the following:

  • review of metadata standards for digital objects
  • creation of internal guidelines and requirements documents
  • networking with those at other institutions to help coordinate site visits of other digitization projects
  • records management planning and reviews
  • learning about the OCR software available to our organization
  • contemplation of the web archiving efforts of organizations and governments around the world
  • reviewing my organization’s social media policies
  • listening to the audio of online training available from PLANETS (Preservation and Long-term Access through NETworked Services)
  • contemplation of the new Journal of Digital Media Management and their recent call for articles

My new favorite quote related to digital preservation comes from What we reckon about keeping digital archives: High level principles guiding State Records’ approach from the State Records folks in New South Wales Australia, which reads:

We will keep the Robert De Niro principle in mind when adopting any software or hardware solutions: “You want to be makin moves on the street, have no attachments, allow nothing to be in your life that you cannot walk out on in 30 seconds flat if you spot the heat around the corner” (Heat, 1995)

In other words, our digital archives technology will be designed to be sustainable given our limited resources so it will be flexible and scalable to allow us to utilise the most appropriate tools at a given time to carry out actions such as creation of preservation or access copies or monitoring of repository contents, but replace these tools with new ones easily and with minimal cost and with minimal impact.

I like that this speaks to the fact that no plan can perfectly accommodate the changes in technology coming down the line. Being nimble and assuming that change will be the only constant are key to ensuring access to our digital assets in the future.

SXSW Panel Proposal – Archival Records Online: Context is King

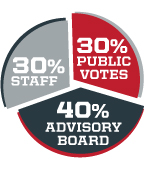
I have a panel up for evaluation on the SXSW Interactive Panel Picker titled Archival Records Online: Context is King. The evaluation process for SXSW panels is based on a combination of staff choice, advisory board recommendations and public votes. As you can see from the pie chart shown here (thank you SXSW website for the great graphic), 30% of the selection criteria is based on public votes. That is where you come in. Voting is open through 11:59 pm Central Daylight Time on Friday, September 2. To vote in favor of my panel, all you need to do is create a free account over on SXSW Panel Picker and then find Archival Records Online: Context is King and give it a big thumbs up.

If my panel is selected, I intend this session to give me the chance to review all of the following:

  1. What are the special design requirements of archival records?
  2. What are the biggest challenges to publishing archival records online?
  3. How can archivists, designers and developers collaborate to build successful web sites?
  4. Why is metadata important?
  5. How can search engine optimization (SEO) inform the design process?

All of this ties into what I have been pondering, writing about and researching for the past few years related to getting archival records online. So many people are doing such amazing work in this space. I want to show off the best of the best and give attendees some takeaways to help them build websites that make it easy to see the context of anything they find in their search.

While archival records have a very particular dependence on the effective communication of context – I also think that this is a lesson that can improve interface design across the board. These are issues that UI and IA folks are always going to be worrying about. SXSW is such a great opportunity for cross pollination. Conferences outside the normal archives, records management and library conference circuit give us a chance to bring fresh eyes and attention to the work being done in our corner of the world.

If you like the idea of this session, please take a few minutes to go sign up at the SXSW Panel Picker and give Archival Records Online: Context is King a thumbs up. You don’t need to be planning to attend in order to cast your vote, though after you start reading through all the great panel ideas you might change your mind!

Rescuing 5.25″ Floppy Disks from Oblivion

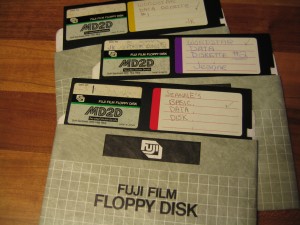
This post is a careful log of how I rescued data trapped on 5 1/4″ floppy disks, some dating back to 1984 (including those pictured here). While I have tried to make this detailed enough to help anyone who needs to try this, you will likely have more success if you are comfortable installing and configuring hardware and software.

I will break this down into a number of phases:

  • Phase 1: Hardware
  • Phase 2: Pull the data off the disk
  • Phase 3: Extract the files from the disk image
  • Phase 4: Migrate or Emulate

Phase 1: Hardware

Before you do anything else, you actually need a 5.25″ floppy drive of some kind connected to your computer.  I was lucky – a friend had a floppy drive for us to work with. If you aren’t that lucky, you can generally find them on eBay for around $25 (sometimes less). A friend had been helping me by trying to connect the drive to my existing PC – but we could never get the communications working properly. Finally I found Device Side Data’s 5.25″ Floppy Drive Controller which they sell online for $55. What you are purchasing will connect your 5.25 Floppy Drive to a USB 2.0 or USB 1.1 port. It comes with drivers for connection to Windows, Mac and Linux systems.

If you don’t want to mess around with installing the disk drive into our computer, you can also purchase an external drive enclosure and a tabletop power supply. Remember, you still need the USB controller too.

Update: I just found a fantastic step-by-step guide to the hardware installation of Device Side’s drive controller from the Maryland Institute for Technology in the Humanities (MITH), including tons of photographs, which should help you get the hardware install portion done right.

Phase 2: Pull the data off the disk

The next step, once you have everything installed, is to extract the bits (all those ones and zeroes) off those floppies. I found that creating a new folder for each disk I was extracting made things easier. In each folder I store the disk image, a copy of the extracted original files and a folder named ‘converted’ in which to store migrated versions of the files.

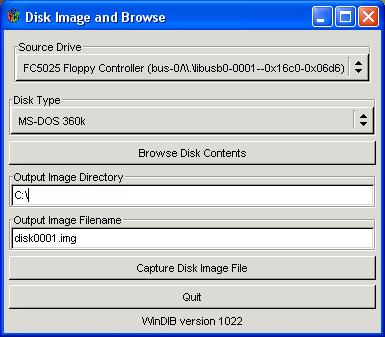
Device Side provides software they call ‘Disk Image and Browse’. You can see an assortment of screenshots of this software on their website, but this is what I see after putting a floppy in my drive and launching USB Floppy -> Disk Image and Browse:

You will need to select the ‘Disk Type’ and indicate the destination in which to create your disk image. Make sure you create the destination directory before you click on the ‘Capture Disk File Image’ button. This is what it may look like in progress:

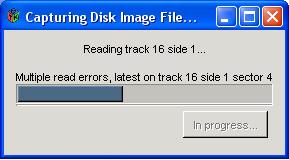
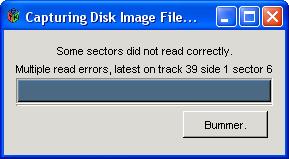
Fair warning that this won’t always work. At least the developers of the software that comes with Device Side Data’s controller had a sense of humor. This is what I saw when one of my disk reads didn’t work 100%:

If you are pressed for time and have many disks to work your way through, you can stop here and repeat this step for all the disks you have on hand.

Phase 3: Extract the files from the disk image

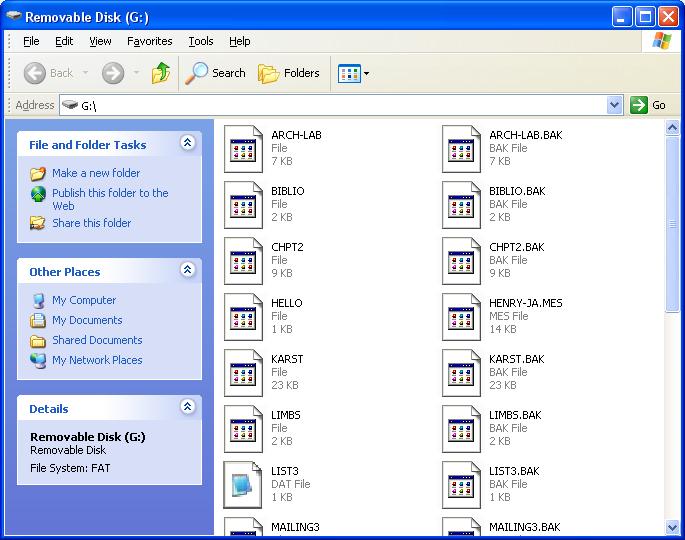
Now that you have a disk image of your floppy, how do you interact with it? For this step I used a free tool called Virtual Floppy Drive. After I got this installed properly, when my disk image appeared, it was tied to this program. Double clicking on the Floppy Image icon opens the floppy in a view like the one shown below:

It looks like any other removable disk drive. Now you can copy any or all of the files to anywhere you like.

Phase 4: Migrate or Emulate

The last step is finding a way to open your files. Your choice for this phase will depend on the file formats of the files you have rescued. My files were almost all WordStar word processing documents. I found a list of tools for converting WordStar files to other formats.

The best one I found was HABit version 3.

It converts Wordstar files into text or html and even keeps the spacing reasonably well if you choose that option. If you are interested in the content more than the layout, then not retaining spacing will be the better choice because it will not put artificial spaces in the middle of sentences to preserve indentation. In a perfect world I think I would capture it both with layout and without.

Summary

So my rhythm of working with the floppies after I had all the hardware and software installed was as follows:

  • create a new folder for each disk, with an empty ‘converted’ folder within it
  • insert floppy into the drive
  • run DeviceSide’s Disk Image and Browse software (found on my PC running Windows under Start -> Programs -> USB Flopy)
  • paste the full path of the destination folder
  • name the disk image
  • click ‘Capture Disk Image’
  • double click on the disk image and view the files via vfd (virtual floppy drive)
  • copy all files into the folder for that disk
  • convert files to a stable format (I was going from WordStar to ASCII text) and save the files in the ‘converted’ folder

These are the detailed instructions I tried to find when I started my own data rescue project. I hope this helps you rescue files currently trapped on 5 1/4″ floppies. Please let me know if you have any questions about what I have posted here.

Update: Another great source of information is Archive Team’s wiki page on Rescuing Floppy Disks.

Career Update


I have some lovely news to share! In early July, I will join the Library and Archives of Development at the World Bank as an Electronic Records Archivist. This is a very exciting step for me. Since the completion of my MLS back in 2009, I have mostly focused on work related to metadata, taxonomies, search engine optimization (SEO) and web content management systems. With this new position, I will finally have the opportunity to put my focus on archival issues full time while still keeping my hands in technology and software.

I do have a request for all of you out there in the blogosphere: If you had to recommend a favorite book or journal article published in the past few years on the topic of electronic records, what would it be? Pointers to favorite reading lists are also very welcome.

SXSWi: You’re Dead, Your Data Isn’t: What Happens Now?

This five person panel at SXSW Interactive 2011 tackled a broad range of issues related to what happens to our online presence, assets, creations and identity after our death.

Presenters:

There was a lot to take in here. You can listen to the full audio of the session or watch a recording of the session’s live stream (the first few minutes of the stream lacks audio).

A quick and easy place to start is this lovely little video created as part of the promotion of Your Digital Afterlife – it gives a nice quick overview of the topic:

Also take a look at the Visual Map that was drawn by Ryan Robinson during the session – it is amazing! Rather than attempt to recap the entire session, I am going to just highlight the bits that most caught my attention:

Laws, Policies and Planning
Currently individuals are left reading the fine print and hunting for service specific policies regarding access to digital content after the death of the original account holder. Oklahoma recently passed a law that permits estate executors to access the online accounts of the recently deceased – the first and only state in the US to have such a law. It was pointed out during the session that in all other states, leaving your passwords to your loved ones is you asking them to impersonate you after your death.

Facebook has an online form to report a deceased person’s account – but little indication of what this action will do to the account. Google’s policy for accessing a deceased person’s email requires six steps, including mailing paper documents to Mountain View, CA.

There is a working group forming to create model terms of service – you can add your name to the list of those interested in joining at the bottom of this page.

What Does Ownership Mean?
What is the status of an individual email or digital photo? Is it private property? I don’t recall who mentioned it – but I love the notion of a tribe or family unit owning digital content. It makes sense to me that the digital model parallel the real world. When my family buys a new music CD, our family owns it – not the individual who happened to go to the store that day. It makes sense that an MP3 purchased by any member of my family would belong to our family. I want to be able to buy a Kindle for my family and know that my son can inherit my collection of e-books the same way he can inherit the books on my bookcase.

Remembering Those Who Have Passed
How does the web change the way we mourn and memorialize people? Many have now had the experience of learning of the passing of a loved one online – the process of sorting through loss in the virtual town square of Facebook. How does our identity transform after we are gone? Who is entitled to tag us in a photo?

My family suffered a tragic loss in 2009 and my reaction was to create a website dedicated to preserving memories of my cousin. At the Casey Feldman Memories site, her friends and family can contribute memories about her. As the site evolved, we also added a section to preserve her writing (she was a journalism student) – I kept imagining the day when we realized that we could no longer access her published articles online. I built the site using Omeka and I know that we have control over all the stories and photos and articles stored within the database.

It will be interesting to watch as services such as Chronicle of Life spring up claiming to help you “Save your memories FOREVER!”. They carefully explain why they are a trustworthy digital repository and why they backup their claims with a money-back guarantee.

For as little as $10, you can preserve your life story or daily journal forever: It allows you to store 1,000 pages of text, enough for your complete autobiography. For the same amount, you could also preserve less text, but up to 10 of your most important photos. – Chronicle of Life Pricing

Privacy
There are also some interesting questions about privacy and the rights of those who have passed to keep their secrets. Facebook currently deletes some parts of a profile when it converts it to a ‘memorial’ profile. They state that this is for the privacy of the original account holder. If users are ultimately given more power over the disposition of their social web presence – should these same choices be respected by archivists? Or would these choices need to be respected the way any other private information is guarded until some distant time after which it would then be made available?

Conculsion
Thanks again to all the presenters – this really was one of the best sessions for me at SXSWi! I loved that it got a whole different community of people thinking about digital preservation from a personal point of view. You may also want to read about Digital Death Day – one coming up in May 2011 in the San Francisco Bay Area and another in September 2011 in the Netherlands.

Image credit: Excerpt from Ryan Robinson’s Visual Map created live during the SXSW session.